Online merchants need data to drive decisions. An example is tracking visitor activity. In this post, I’ll review how to set up the reporting of common site interactions using Google Tag Manager.
To be sure, a developer can add JavaScript to a website to support various reporting in Google Analytics. For example, to track clicks on a button, JavaScript can fire an onClick event handler in Google Analytics.
However, Google Tag Manager can track clicks, too, without deploying JavaScript. (For a primer, see “Getting Started with Google Tag Manager, for Ecommerce.”)
For example, the screenshot below is from my company’s site. I want to know how many clicks the “View Pricing” button receives.

How many clicks did the “View Pricing” button receive?
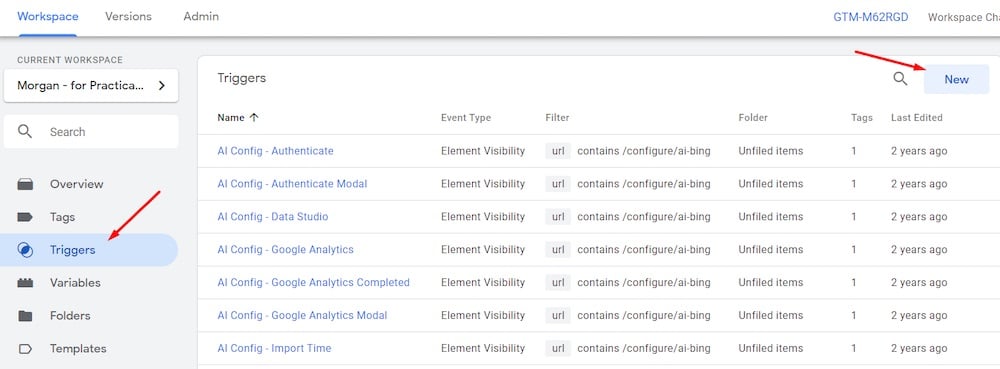
I can track clicks in Google Tag Manager, starting at Triggers > New.
Next, I’ll name the trigger at the top left, replacing “Untitled Trigger” with “View Pricing Clicks.”
I’ll then select Trigger Type > Clicks – Just Links > Some Link Clicks. I’ll leave the two boxes unchecked, and I’ll set “Click Text” = “matches RegEx (ignore case)” = “View Pricing.”
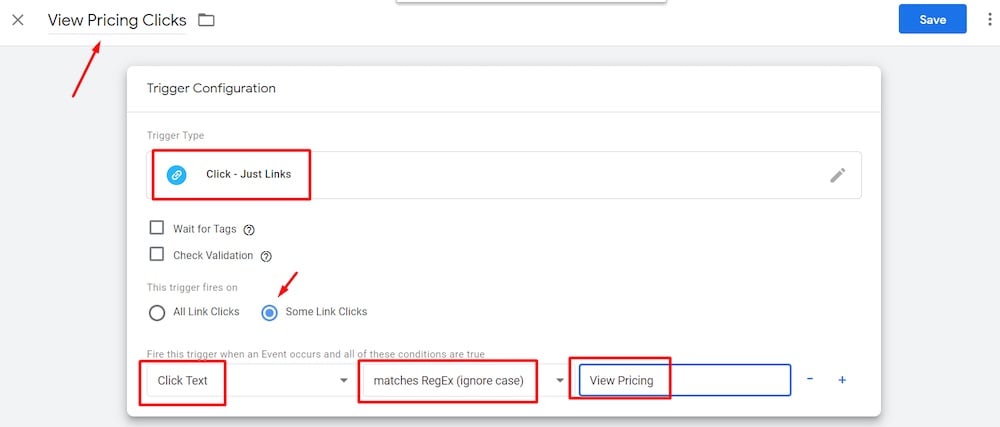
Select Trigger Type > Clicks – Just Links > Some Link Clicks. Set “Click Text” = “matches RegEx (ignore case)” = “View Pricing.” Click image to enlarge.
Note that I selected “matches RegEx (ignore case)” because it’s the most versatile way to look for the text and capitalization of “View Pricing.” For example, the frontend of the site reads “VIEW PRICING” due to CSS. The text in the HTML is “View Pricing.”
Next, I’ll save the trigger.
Creating a Tag
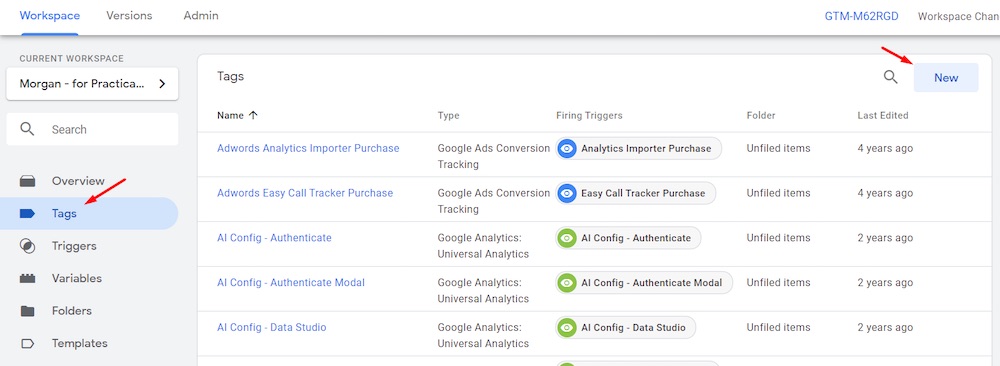
I’ll now create the new tag in Google Tag Manager at Tags > New.
I’ll name the tag at the top left, replacing “Untitled Tag” with “View Pricing Clicks.”
I’ll then select “Google Analytics: Universal Analytics” as the Tag Type and “Event” as the Track Type. I’ll populate the Event Tracking Parameters of “Category,” “Action,” and “Label.” I’ll leave the “Non-Interaction Hit” as “False” and select my Google Analytics Settings variable (or configure if prompted).
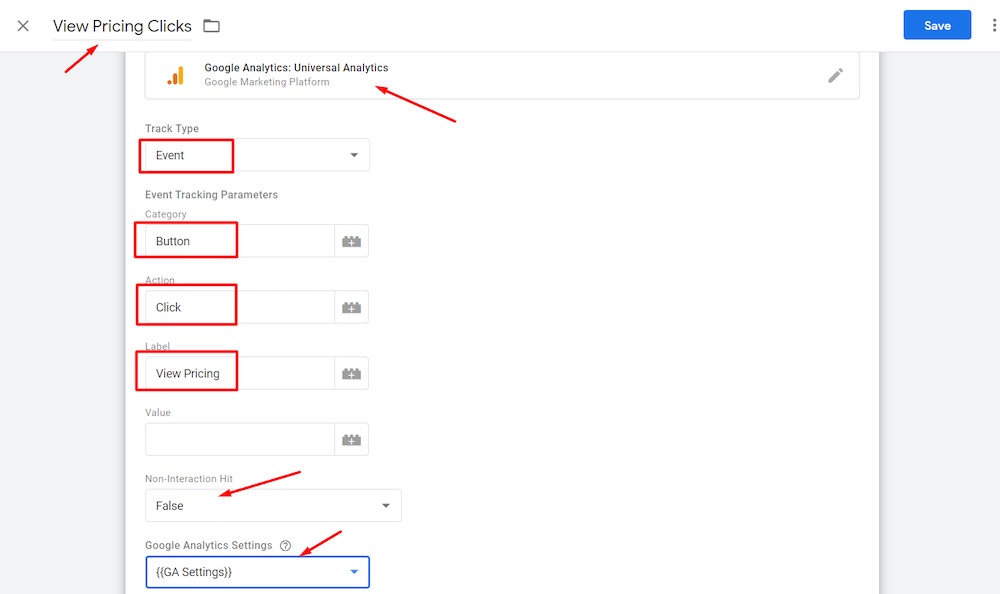
Select “Google Analytics: Universal Analytics” as the Tag Type and “Event” as the Track Type. Populate the Event Tracking Parameters of “Category,” “Action,” and “Label.” Click image to enlarge.
Next, I’ll add the trigger I just created to fire the tag.

Add the trigger to fire the tag.
I’m now ready to save the tag and publish it to Google Tag Manager by clicking on “Submit” in the top-right of the page.
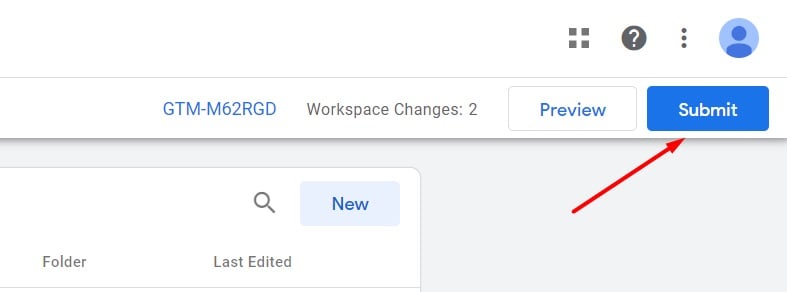
Save and publish the tag by clicking on “Submit” in the top-right of the page.
Verify the Event
It’s important to confirm that the new event is reporting correctly in Google Analytics. To do this, I’ll go to Google Analytics and use Realtime reporting at Realtime > Events. To test, I’ll click “View Pricing” on my website and confirm the click in Realtime.

To confirm the new event, go to Google Analytics, and use Realtime reporting at Realtime > Events. Click image to enlarge.
I’ll also click on the Event Category (“Button”) value to ensure the Event Label of “View Pricing” is properly reporting.

Click on the Event Category (“Button”) value to ensure the Event Label of “View Pricing” is properly reporting.
Tracking Clicks on Phone Numbers
A common element on a website is a clickable phone number for mobile users.
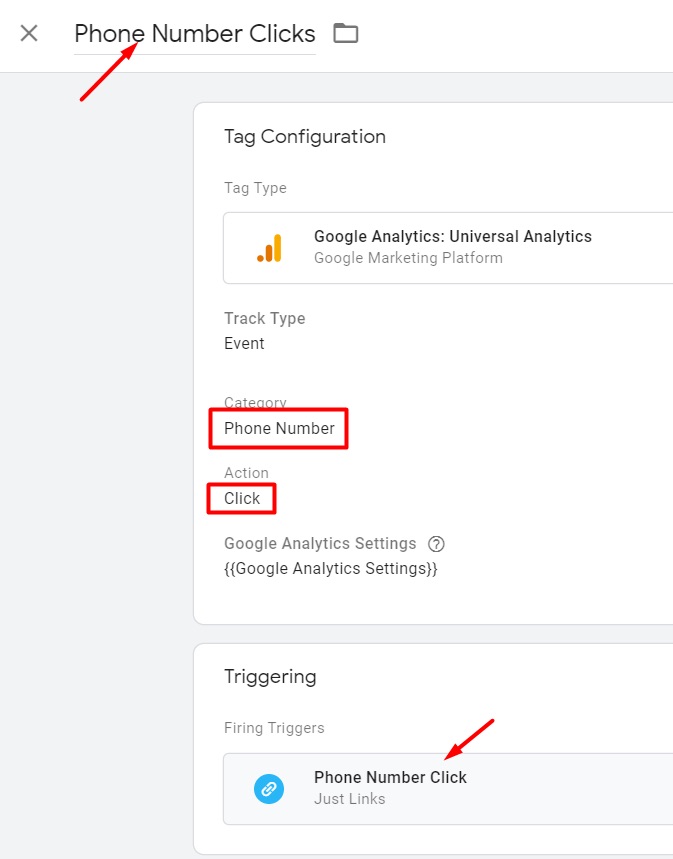
To set up tracking of phone number clicks, start by creating a trigger in Google Tag Manager similar to tracking button clicks, above. The exception is to set the “Click URL” = “contains” = “tel”.
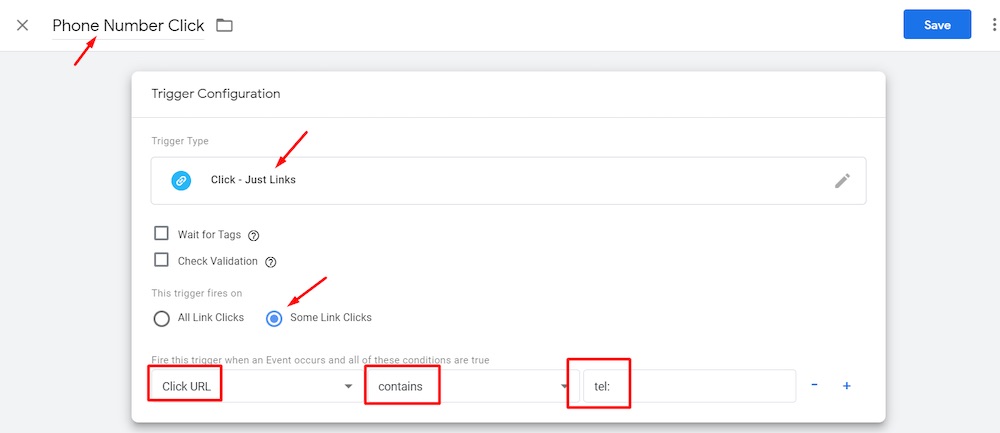
To track phone number clicks, create a trigger in Google Tag Manager similar to tracking button clicks, above. The exception is to set the “Click URL” = “contains” = “tel”. Click image to enlarge.
Then create a tag (like the one to track button clicks). Set the Event Category and Event Label values and leave the Event Label blank.
Next, I’ll verify, in Realtime reporting, that the click event is firing in Google Analytics.

Verify, in Realtime reporting, that the click event is firing in Google Analytics. Click image to enlarge.
More Tracking
I’ve explained in the post how to track clicks to a “View Pricing” button and a telephone number. There are many more possibilities for ecommerce sites, however. Examples include:
- Error messages from unsuccessful form submission;
- Clicks to add-to-cart buttons;
- Clicks to a shipping-rate estimator;
- Chat window opens and engagement.

